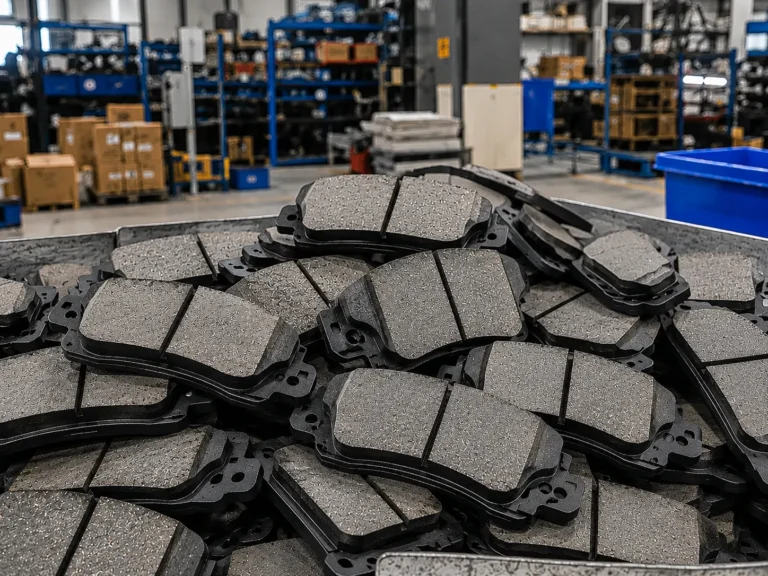

Introduction
What are brake pads? Brake pads are the replaceable friction components in a disc brake that clamp against the rotor to slow and stop a vehicle. If you sell them, install them or buy them by the carton, that one-line answer is only the starting point.
People search “what is a brake pad” or even “what are break pads” for different reasons. A counter clerk needs to know why two identical-looking pads carry different part numbers. A technician needs to know why a brand-new set is already wearing at an angle. A purchasing manager needs to know what to write on a purchase order so the next container arrives with the right parts.
To define brake pads properly for those readers, we cover how a pad works inside the caliper, its parts and materials, how pads are identified, when they should be replaced, why they wear unevenly or make noise, how they work with rotors, and how they are manufactured and tested. At each step, we point out what a buyer should check and what belongs on a spec sheet. We write as a brake parts manufacturer, and where we share numbers from our own production floor or test bench, we say so.
01
What Are Brake Pads?
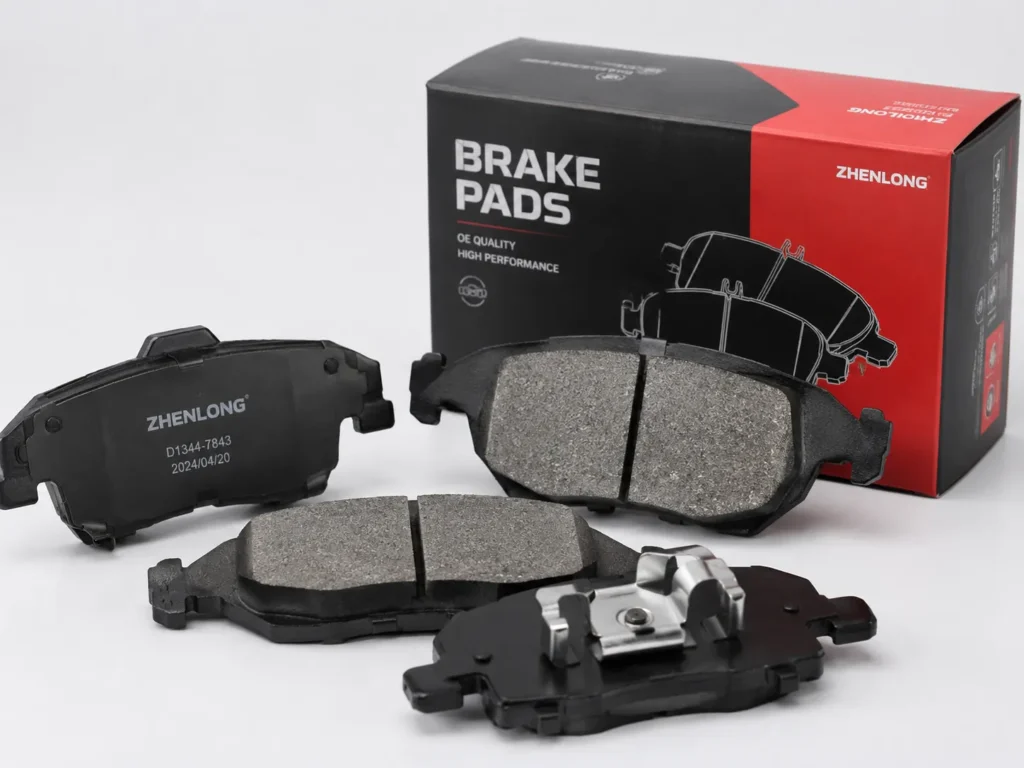
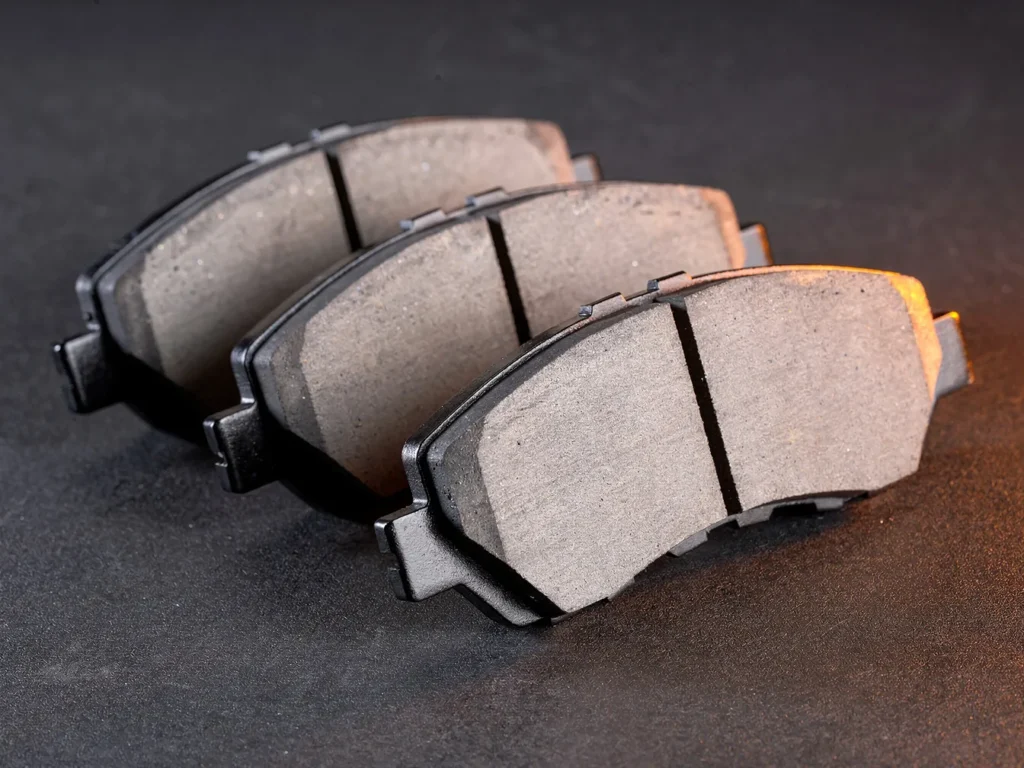
A brake pad is a steel backing plate with a layer of friction material bonded or mechanically locked to one side. Two pads sit inside each brake caliper, one on each side of the rotor. When the driver presses the brake pedal, the caliper squeezes the pads against the spinning rotor. The friction between the pad and the rotor slows the wheel.
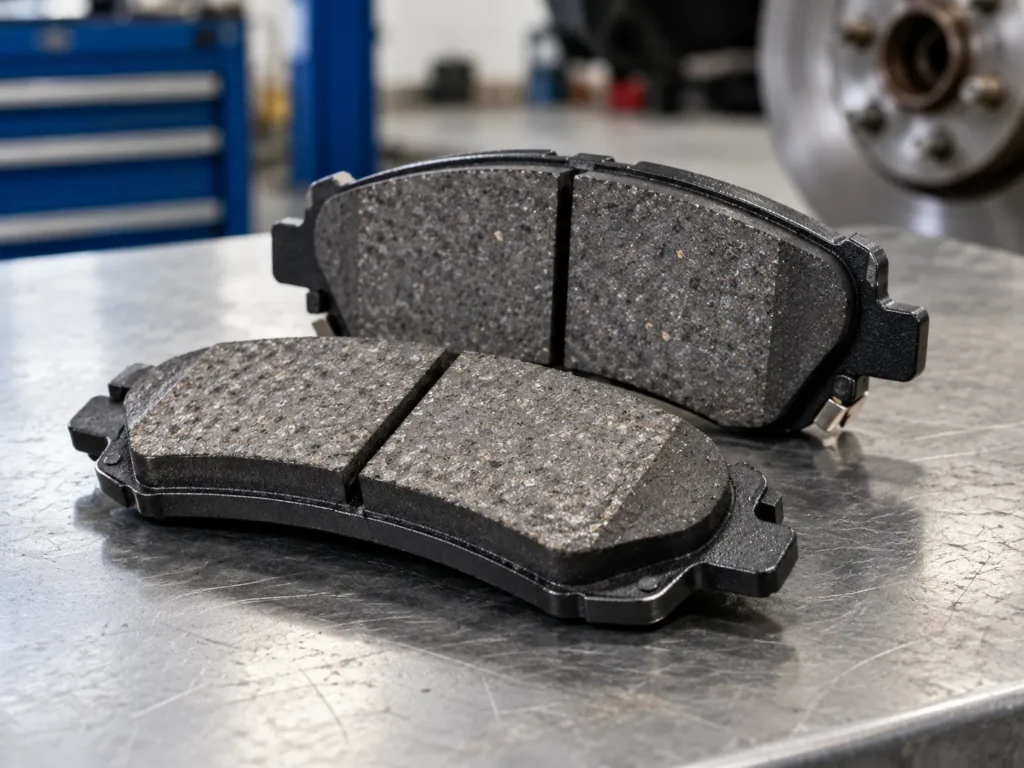
So, what do brake pads look like? Out of the box, a typical passenger-car pad is a flat, slightly curved rectangle, often 100–160 mm long. The dark, slightly rough side is the friction material. The other side is a painted or coated steel plate, usually with a multi-layer shim attached. You will often see a slot cut across the middle of the friction face, angled edges at each end (chamfers), and sometimes a small metal tab, the wear indicator, clipped to one end.
What do good brake pads look like? On a new pad, look for a flat friction surface with no cracks or chips, friction material fully bonded to the plate with no edge gap, clean chamfers and slots matching the OE design, a burr-free backing plate with straight tabs, a fully seated shim, and clear part number and batch markings. On a used pad, “good” means even wear, plenty of material above the replacement point, and no glazing, oil contamination or heat cracks.
Where Are Brake Pads Located?
A brake pad on a car sits inside the caliper, which straddles the brake rotor at each wheel. Most modern passenger cars have disc brakes on the front axle, and many also have them on the rear. Some smaller cars and light trucks still use drum brakes at the rear. Drum brakes use curved brake shoes instead of pads.
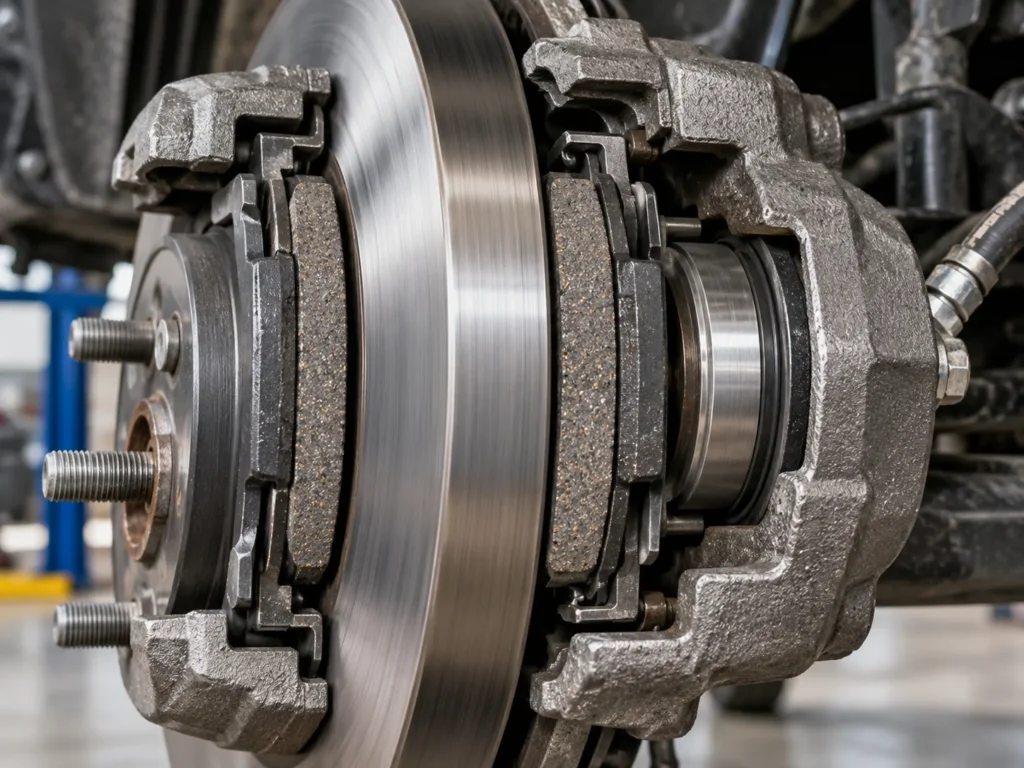
Each caliper holds two pads:
- Inner (inboard) pad: sits on the side facing the vehicle center, next to the caliper piston on a floating caliper.
- Outer (outboard) pad: sits on the wheel side, usually against the caliper body or “fingers.”
Inner and outer brake pads are often not interchangeable. The inner pad may carry the wear indicator, a piston clip (common on rear calipers) or a different shim. The outer pad may have a different backing plate profile to fit the caliper fingers. When you receive pads into stock, check that each axle set contains the correct inner/outer combination. A set packed with two inner pads will fit badly or not at all, and it will come back as a return.
What Do Brake Pads Do?
Brake pads do three jobs at the same time
- Create controlled friction, converting caliper clamping force into braking force at the rotor.
- Manage heat, working consistently from a cold morning stop to repeated hard stops on a downhill road.
- Wear predictably. Pads are sacrificial: they wear so the rotor wears much more slowly.
A pad that creates friction well but fails at heat or wear causes fade, noise, rotor damage or comebacks.
02
How Do Brake Pads Work?
From Brake Pedal to Brake Caliper
Here is the sequence in a typical hydraulic disc brake system, step by step
- The driver presses the pedal, which acts as a lever on the driver’s foot force.
- The brake booster adds assistance before the force reaches the master cylinder.
- The master cylinder pressurizes the brake fluid. Because fluid is essentially incompressible, the pressure reaches every caliper.
- The caliper piston moves outward under that pressure.
- The pads clamp the rotor.
- On a floating (sliding) caliper, the piston pushes the inner pad against the rotor. The reaction force slides the caliper body on its guide pins and pulls the outer pad into contact.
- On a fixed caliper, pistons on both sides push the inner and outer pads at the same time.
- The driver releases the pedal. Pressure drops, the piston seal pulls the piston back slightly, and the pads relax away from the rotor.
This sequence explains why caliper condition matters so much to pad wear. If the guide pins are seized, the outer pad never gets an equal share of the work. If the piston sticks, one pad drags all the time.
How Brake Pads Create Friction Against the Rotor
The friction material for brake pads is not a single substance. It is a compound of binders, fibers, friction modifiers and fillers, which we cover in detail below. When the pad is pressed against a cast-iron rotor, two kinds of friction happen together:
- Abrasive friction: hard particles in the pad and on the rotor surface cut and scrape at a microscopic level.
- Adhesive friction: a thin layer of friction material transfers onto the rotor surface. The pad then rubs against this layer, which repeatedly forms bonds and breaks them.
The balance between the two depends on the brake pads’ friction material. Abrasive compounds bite hard but wear rotors faster; adhesive compounds are quieter and cleaner but need a well-established transfer layer.
The friction coefficient (μ) describes how much braking force is produced for a given clamping force. Most passenger-car pads operate around μ 0.35–0.45. More important than the headline number is how stable μ stays as temperature, speed and pressure change.
How Braking Energy Is Converted Into Heat
Brakes do not “destroy” energy. They convert the vehicle’s kinetic energy into heat.
A simple example: a 1,500 kg car at 100 km/h (about 27.8 m/s) carries roughly ½ × 1,500 × 27.8², or about 580 kJ, of kinetic energy. A full stop turns nearly all of it into heat within a few seconds, mostly at the front brakes. Rotor surfaces commonly run at 100–300 °C in normal driving and can climb well past 500 °C during towing or long descents. Most of the heat goes into the rotor and the air, and some into the pad and caliper. That is why friction materials are tested across temperature, and why an overheated pad can fade, glaze or crack.
03
What Are the Main Parts of a Brake Pad?
The main parts of a brake pad are the friction material, the backing plate, the shim, the chamfers and slots, and, on many designs, a wear indicator. Each one affects performance, noise and fitment.
Friction Material
The brake pad friction material is the working layer, typically about 10–12 mm thick on a new passenger-car pad. Many pads also have an underlayer: a softer, heat-resistant layer between the friction material and backing plate that improves bonding, reduces heat transfer to the caliper and helps with noise.
On the Spec Sheet
State the formulation family (for example, ceramic, low-metallic), the minimum friction thickness, whether an underlayer is required, and the expected friction class or test reference.
Backing Plate
The backing plate is stamped steel, usually around 5–6 mm thick on passenger cars, and must stay flat and accurate under clamping force. The friction material is bonded with adhesive, integrally molded, or locked on by mechanical retention (small hooks or mesh), which is common on heavy-duty pads.
Buyer Check
Clean stamping, accurate tab positions, consistent thickness and a corrosion-resistant coating. An undersized plate rattles; an oversized one binds in the bracket and drags.
Shim
The shim is a thin rubber-coated or multi-layer steel layer on the back of the backing plate. It damps vibration between the pad and the caliper, which is the main way pads reduce squeal, and it slows heat transfer into the caliper piston.
Buyer Check
Confirm the shim matches the OE design (one- or two-piece, clip-on or bonded) and has no lifted corners. A pad with the wrong shim can fit perfectly and still squeal.
Chamfers and Slots
Chamfers are angled cuts at the ends of the friction material; slots are grooves across the face. Together they shift the pad’s natural vibration frequencies to prevent squeal, reduce leading-edge dig, vent gas, water and debris, and speed up bedding.
Buyer Check
Chamfer angle and slot width, depth and position should follow the OE drawing. They look cosmetic, but they are acoustic design features.
Wear Indicator
An acoustic indicator is a spring-steel tab that touches the rotor at about 2–3 mm of remaining material and squeals. An electronic sensor is a wire loop that breaks or grounds against the rotor and lights a dashboard warning; it is common on European vehicles and often sold separately.
Buyer Check
The indicator must be on the correct pad (usually inner) and edge. For sensor-equipped vehicles, specify whether the sensor is in the box.
04
What Are Brake Pads Made Of?
What are brake pads made of? Or, as many customers put it, what are brake pads made out of? Nearly all brake pad compounds are built from four groups of ingredients
- Binders: usually phenolic resin. The binder holds everything together and softens and cures under heat.
- Reinforcing fibers: steel, mineral, aramid, glass or ceramic fibers. They provide strength and help keep the pad intact at high temperatures.
- Friction modifiers: abrasives such as alumina or zirconium silicate raise friction and clean the rotor surface. Lubricants such as graphite and metal sulfides stabilize friction and reduce noise.
- Fillers: materials such as barium sulfate, mica and vermiculite. They control density, heat behavior and cost.
So when someone asks “what is a brake pad made of?”, the honest answer is “a recipe.” Two pads can both be called “ceramic” and still behave very differently, depending on the binder content, fiber type and how they were pressed and cured.
In the trade, brake pad materials are grouped into four families. The table below compares these brake pad material types side by side as a practical brake pad material comparison.
Ceramic Brake Pads
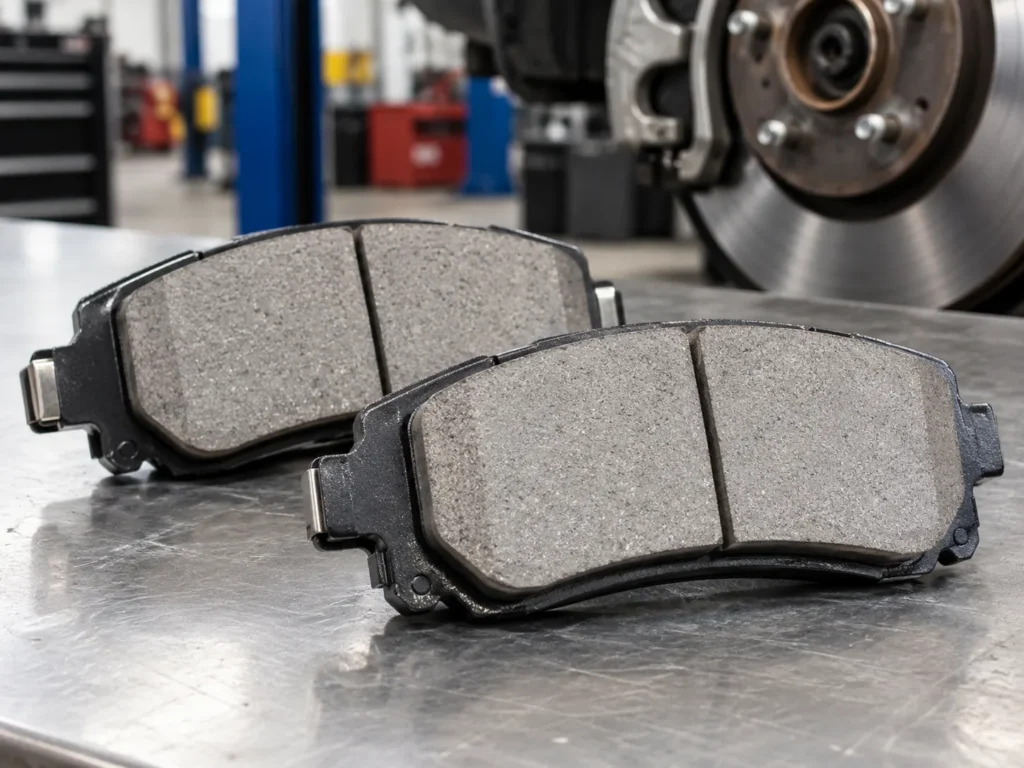
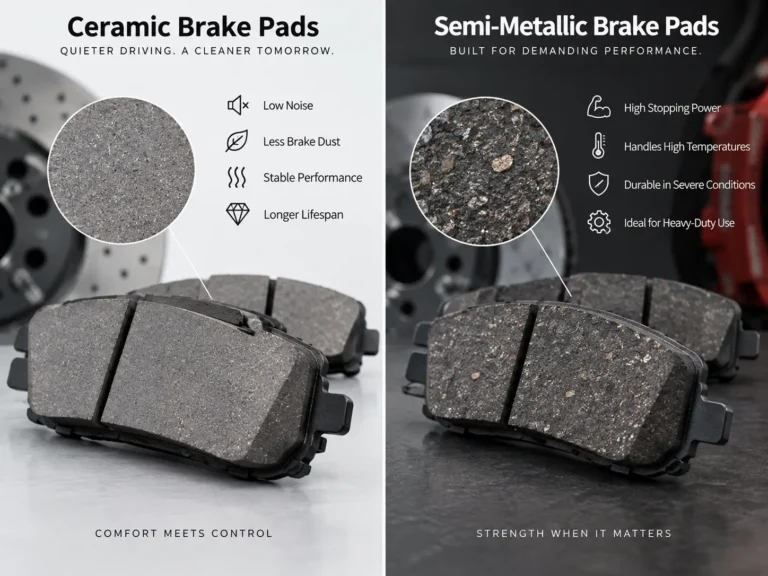
Ceramic brake pads use ceramic and mineral fibers with non-ferrous fillers and little or no steel. Compared with semi-metallic pads, they are quieter, produce lighter dust that is less visible on wheels, are gentle on rotors, and keep a stable friction level across normal temperatures. They are the default for many passenger cars and crossovers in North America, but not automatically right for a heavily loaded light truck or a vehicle that tows.
What We Saw in Testing:
In a passenger-car ceramic pad development test, we ran the same formulation through 10 controlled braking cycles. Average friction coefficient started at μ 0.39, dropped to μ 0.36 at approximately 350°C, and recovered to μ 0.38 after cooling. For us, the important result was not the peak number, but how stable the friction level remained as temperature changed. A pad that swings widely between cold and hot feels inconsistent to the driver, even if its peak μ looks impressive on paper.
Semi-Metallic Brake Pads
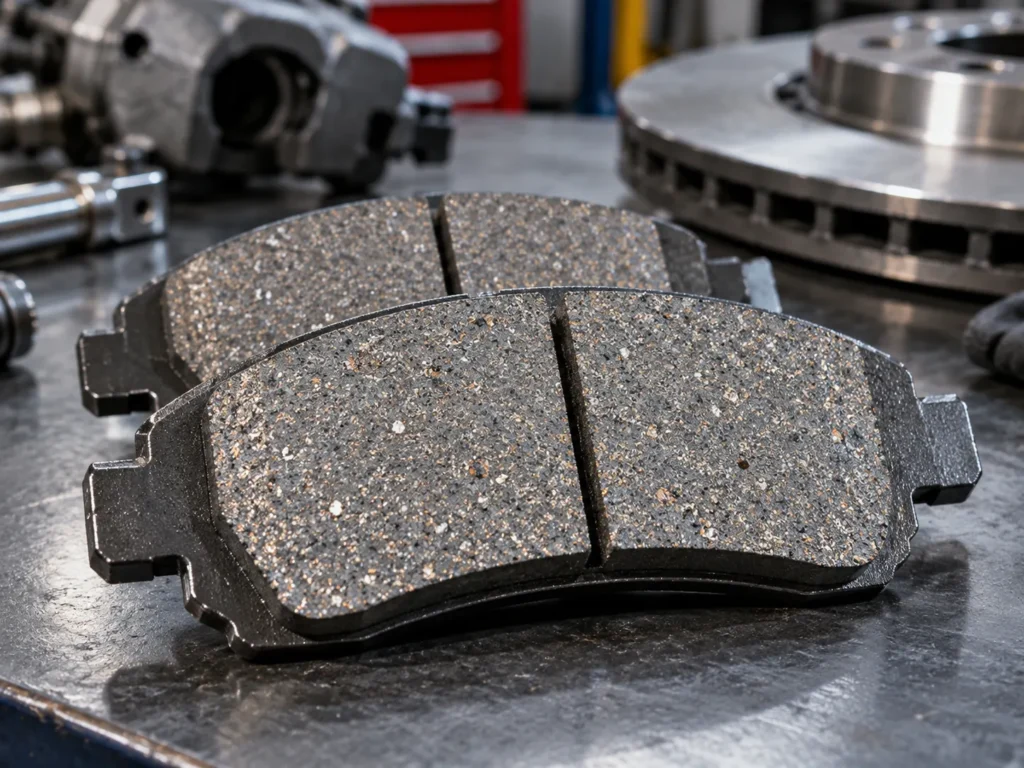
Semi-metallic brake pads contain a large share of metal, typically steel fiber and iron powder, along with graphite and other modifiers. The brake pads’ metal content conducts heat away from the friction surface, which gives good fade resistance under heavy loads.
Their strengths are strong initial bite, durability under high temperatures and good performance on heavier vehicles. The trade-offs are more brake dust, more noise and faster rotor wear, especially if the rotor surface is rough or the pad is poorly shimmed.
Low-Metallic Brake Pads
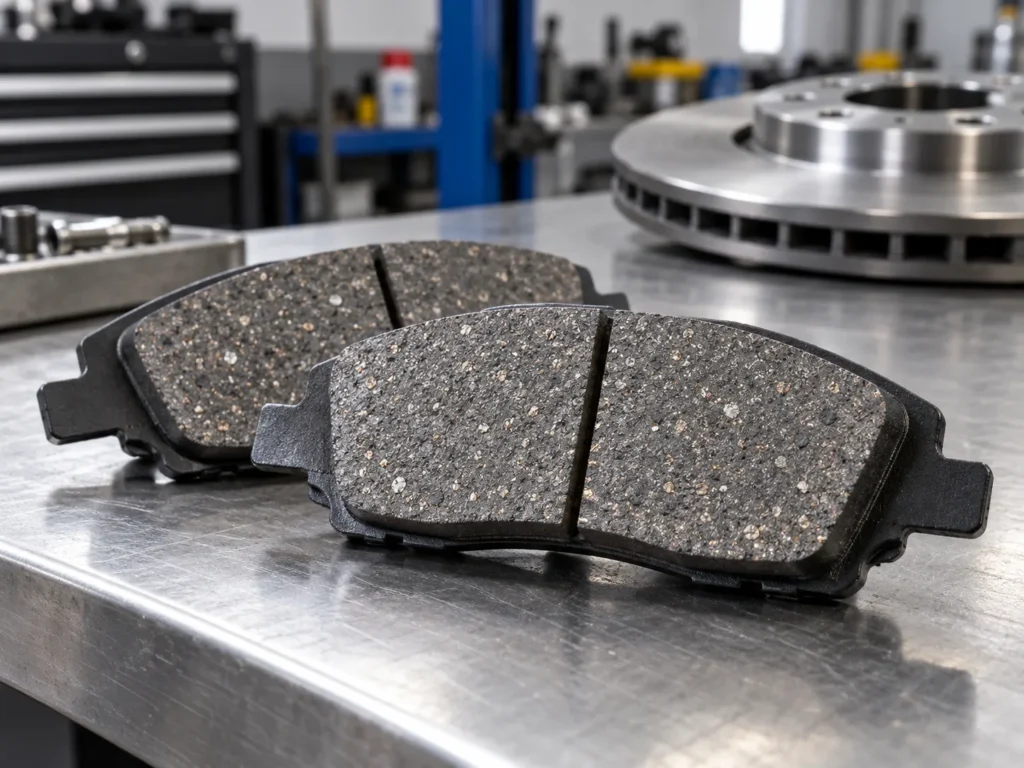
Low-metallic pads (sometimes called low-steel or low-met NAO) sit between organic and semi-metallic formulations. They contain roughly 10–30% metal in an organic base. They are common in Europe, where drivers often expect stronger high-speed braking response. They usually produce more dust than ceramic pads, but they offer good fade resistance at a reasonable cost.
NAO Brake Pads
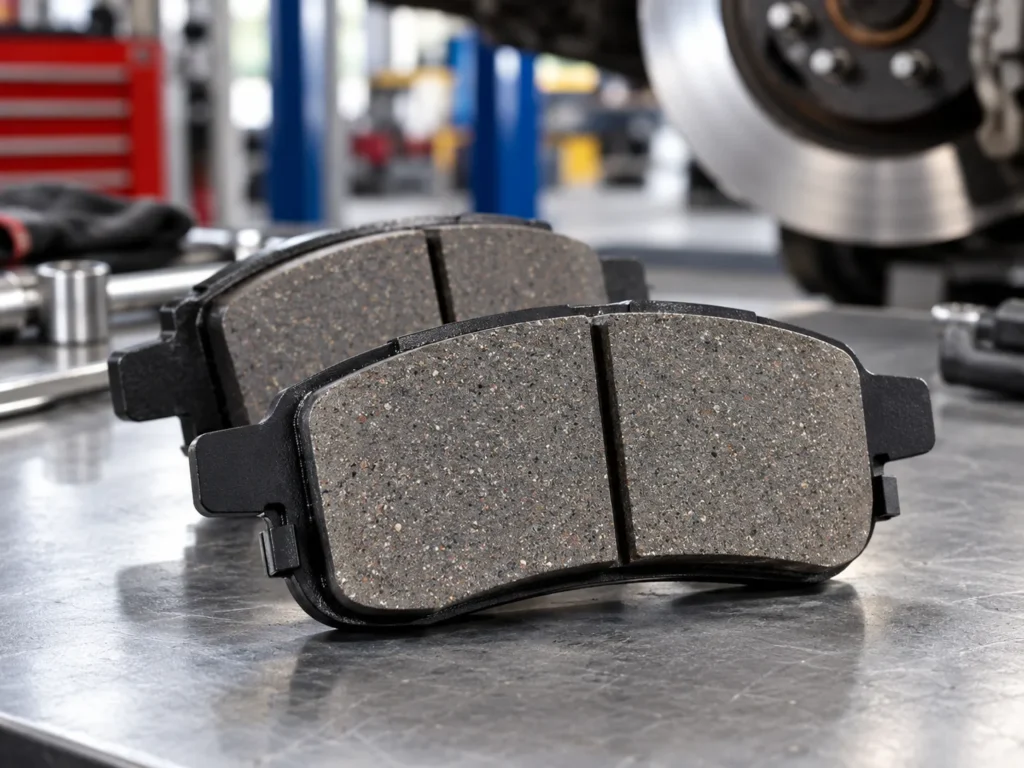
What are organic brake pads? NAO stands for non-asbestos organic: organic fibers (such as aramid), rubber, resins and fillers, with little or no metal. NAO pads are soft, quiet and inexpensive, but they wear faster and tolerate less heat than ceramic or semi-metallic pads. They suit lighter vehicles and gentle driving.
The difference in brake pads goes beyond these four labels. The material of brake pads also affects dust and particulate emissions, which regulators and researchers are watching closely.
Industry Research Report:
The BRAKE Report summarized a Ricardo study comparing brake particulate emissions across different vehicles and friction materials. It reported brake-related PM2.5 of roughly 2–3 mg/km for the ICE vehicle, compared with 0.3–1.2 mg/km for the EV in the study. In its pad-material comparison, low-dust and ceramic formulations were around 1 mg/km, while some budget and organic pads reached up to 3.5 mg/km. The useful point for buyers is that friction-material selection can affect not only noise, dust and wear, but also measurable particulate output.
Copper is another factor. Under the “Better Brakes” laws in California and Washington, friction materials sold there must contain less than 0.5% copper by weight from 2025, and compliant pads usually carry the LeafMark symbol. If you sell into those markets, the brake material you buy must meet that limit.
For a deeper brake pad comparison, including the brake pad differences that matter most at the parts counter, see our guide to Ceramic vs Semi-Metallic Brake Pads.
On the Purchase Order
Do not write only “ceramic pads.” Specify the formulation family, the target friction class or test reference, the copper-content requirement (for example, “copper-free, LeafMark N” or “Cu < 0.5%”), and whether the pads must be ECE R90-approved for the target market.
05
What Are the Main Types of Brake Pads?
Material is one way to classify pads. In the trade, types of brake pads are also grouped by vehicle segment and duty. These are the different kinds of brake pads most auto parts stores and repair shops handle every week, and the brake pad types you will see in almost every catalog.
Passenger Car Brake Pads

Passenger car pads make up the largest share of most store inventories. The priorities here are quiet operation, low dust, smooth pedal feel and good rotor life. Ceramic and low-metallic formulations dominate. Fitment accuracy matters most here. Many different pad shapes look nearly identical, and a millimeter of difference in backing plate profile can stop a pad from fitting the caliper bracket.
SUV and Light-Truck Brake Pads

SUVs, pickups and vans are heavier, and they often tow or carry loads. Their brakes absorb more energy per stop. Truck brake pad material is usually chosen for heat capacity and wear life: semi-metallic compounds or heavy-duty ceramic formulations with higher thermal stability. Pads for these vehicles are physically larger and may use mechanical retention on the backing plate.
When a customer asks for “different brake pads” for the same truck, ask how it is used. A fleet van making 200 stops a day needs a different compound from a pickup that tows a trailer on weekends, even though the pad shape is the same.
Street Replacement and Performance Brake Pads

Street replacement pads reproduce OE behavior: similar friction, noise, dust and wear. Performance pads trade some comfort for higher friction and fade resistance when hot, and may feel weaker when cold or be noisier in daily driving.
So when a customer asks what type of brake pads are there, the useful answer is: a few material families used across a few duty segments, all matched to the vehicle. Different types of brake pads are not ranked from “worst” to “best”; they are built for different jobs.
06
How Are Brake Pads Identified?
This is where most wrong-part returns start. Two pads can look identical on a shelf and differ by a few millimeters in plate profile, a different wear indicator position or a different shim. A reliable identification system prevents those errors.
OE Numbers
The OE number is the vehicle manufacturer’s part number for the factory-fitted or genuine replacement pad set. Toyota, for example, uses 04465 for many front pad kits and 04466 for many rear kits.
OE numbers get superseded when a part is updated. The Toyota bulletin discussed later lists both the previous rear kit (04466-47060) and the updated kit (04466-47061); a buyer cross-referencing only the old number would miss the engineering change.
Buyer Check
Record the OE number exactly as written, including suffixes, and confirm whether it has been superseded.
FMSI and WVA Numbers
The FMSI number identifies pad shape in a system maintained by the Friction Materials Standards Institute; disc pads carry a “D” number such as D1210, and most North American catalogs use it as their geometry reference. WVA numbers, five digits long, do the same job in Europe.
Both describe shape, not material or quality. Two pads with the same FMSI number can differ completely in compound, shim and wear indicator, so these numbers narrow the geometry but do not finish the job.
Aftermarket Cross References
Most store buyers already have a list of supplier part numbers from their current brands. A cross reference maps these numbers to equivalent parts from other manufacturers.
How to use cross references safely, step by step
- Start from the part number your customers already buy, whether OE, FMSI or the current aftermarket number.
- Cross-reference it to the new supplier’s part number.
- Confirm that the FMSI or WVA shape matches.
- Check for differences in wear indicator, sensor provision, shim type and inner/outer pad configuration.
- For high-volume SKUs, request a physical sample and compare it side by side with your current part.
- Record the confirmed cross reference in your system so the next order does not repeat the work.
Vehicle and VIN Information
When numbers are missing, vehicle data closes the gap. Year, make, model and engine are the minimum. The 17-character VIN adds the model year (10th character), the plant and, through catalog lookups, the production date. Some manufacturers fit different brake sizes to the same model by engine, trim or build date; Volkswagen Group vehicles, for example, use PR option codes to identify the brake package.
Practical Rule
For any vehicle where the catalog shows more than one pad option, ask for the VIN or measure the old pad before ordering.
07
When Should Brake Pads Be Replaced?
Pads should be replaced before the friction material is worn so thin that braking performance suffers or the backing plate contacts the rotor. Most shops judge this by thickness, wear indicators and the condition of the friction surface.
The brake pad levels chart below is a practical guide for passenger-car pads. Always check the vehicle manufacturer’s minimum specification.
Low Pad Thickness
Measure the friction material only, not the backing plate.
Step by step
- Remove the wheel. Some calipers allow a visual check through the wheel, but a measurement is more reliable.
- Measure both the inner and the outer pad. The inner pad often wears faster on floating calipers and is harder to see.
- Measure at both ends of each pad to detect taper wear.
- Record the lowest reading and compare it with the vehicle specification and with the brake pad levels above.
Wear Indicators
A steady high-pitched squeal while driving that changes when braking usually means an acoustic indicator is touching the rotor. Electronic sensors light a dashboard warning and usually need replacing with the pads.
Uneven Wear
If one pad is much thinner than the other, or the friction material is worn into a wedge shape, the problem is usually the caliper, slides or hardware, not the pad. Replace the pads, but find and fix the cause first, or the new set will wear the same way.
Cracks, Glazing or Contamination
Replace pads that show:
- cracks across the friction material or separation from the backing plate;
- glazing, which is a shiny, hardened surface caused by overheating that reduces friction;
- contamination from oil, grease or brake fluid, which cannot be cleaned out of the friction material.
Find and fix the leak first, or the new set will be ruined just as quickly.
For a step-by-step inspection routine, see our separate guide, When Should Brake Pads Be Replaced?
08
Why Do Brake Pads Wear Unevenly or Make Noise?
Uneven Brake Pad Wear
There are three common uneven-wear patterns, and each has a typical cause:
Industry Case — Toyota Prius Rear Pad Uneven Wear:
Toyota issued T-SB-0248-12 (published through the NHTSA database) for certain 2010–2012 Prius and 2012 Prius PHV vehicles that could develop uneven rear brake pad wear, sometimes accompanied by grinding or scraping noise. Toyota introduced an updated rear brake pad kit and instructed technicians to inspect the pad support clips, remove corrosion from the mounting plate, and check the rear rotor before installing the new pads.
The bulletin specifies a rear disc standard thickness of 9.0 mm, a minimum thickness of 7.5 mm, and a maximum disc runout of 0.15 mm, measured 10 mm from the outer edge. Toyota also required replacement anti-squeal shims with the new pads and warned against getting grease on the friction surfaces.
This is a useful reminder that uneven pad wear is not always simply a “bad pad.” Pad support, corrosion, rotor condition, shim installation and caliper geometry can all be part of the system diagnosis. For a store, it is also a reminder to track OE supersessions. A store still stocking the pre-update kit number would keep selling the part the manufacturer had already revised.
Brake Pad Squeal
Brake squeal is a vibration problem. When the pad, rotor and caliper vibrate together at roughly 1–12 kHz, the rotor acts like a loudspeaker. Squeal depends on the whole system, not just the pad: friction material, shim, chamfers, slots, rotor surface and caliper stiffness.
Common contributors include:
- missing, worn or reused shims;
- a rough or glazed rotor surface, or a rotor below minimum thickness;
- pads without the OE-style chamfer or slot pattern;
- incomplete bedding, so the transfer layer is uneven;
- dry or corroded abutment clips that let the pad move.
Rotor and Caliper Problems
A rotor with excessive runout (wobble) or thickness variation knocks the pads back and forth on every revolution. Over time, this creates uneven deposits and thickness variation (DTV), which the driver feels as pedal pulsation and steering shake. A caliper that does not release completely keeps the pad dragging, overheating it and accelerating wear.
Shim, Hardware and Installation Issues
Many comebacks come from installation details, not from the pad itself.
A correct installation goes like this
- Clean the caliper bracket abutments down to bare metal and remove all corrosion.
- Fit new abutment clips (support clips) if they are supplied or if the old ones are worn.
- Lubricate slide pins and contact points with the correct brake grease. Keep grease off the friction surfaces and rotor.
- Check that the slide pins move freely and the boots are intact.
- Install new shims if the pad design requires them. Do not reuse worn shims.
- Check the rotor for thickness, runout and surface condition.
- Torque the caliper bolts and wheel nuts to specification.
- Bed in the new pads before returning the vehicle.
09
How Do Brake Pads and Rotors Work Together?
Pad-to-Rotor Contact
The pad and the rotor are a friction pair. They should be designed, installed and inspected as one system. Braking force depends on the contact between the two surfaces. If the rotor is warped, scored or worn unevenly, the pad touches it only in patches. That reduces braking efficiency and creates hot spots.
Transfer Layer
During bedding and normal use, a thin, even film of friction material is deposited on the rotor surface. This transfer layer is what the pad actually rubs against once it is established. An even transfer layer gives smooth, consistent braking. An uneven one, often caused by improper bedding or holding the brakes at a stop when they are very hot, leaves patches with different friction levels. The driver feels this as vibration.
Why Rotor Condition Affects New Brake Pads
New pads on a worn rotor are a common cause of early complaints. The new pad is flat, while the old rotor may be grooved, lipped or coated with deposits from the previous compound, so the pad takes long to conform, braking feels weak and noise is more likely.
Before installing new pads, check:
- thickness against the minimum stamped on the rotor;
- runout with a dial indicator;
- thickness variation at several points around the rotor;
- surface condition: scoring, heat spots, corrosion, glazing.
If the rotor is out of specification, resurface or replace it.
To understand how rotor design and condition affect braking, read our guide, What Is a Brake Rotor?
Brake Pad and Rotor Bedding
Bedding establishes the transfer layer and seats the pad surface. Always follow the pad manufacturer’s instructions where they are provided.
A typical procedure looks like this
- In a safe, legal location, make 8–10 moderate stops from about 60 km/h (35 mph) down to about 10 km/h (5 mph). Do not come to a complete stop.
- Make 2–3 firmer stops from about 80 km/h (50 mph) down to 10 km/h, again without stopping completely.
- Drive for several minutes with minimal braking to let the brakes cool.
- Avoid holding the brake pedal hard while stationary with hot brakes, since this can imprint pad material onto the rotor.
For repair shops, adding bedding to the job card is one of the cheapest ways to reduce noise and vibration comebacks.
10
How Are Brake Pads Manufactured and Tested?
How a pad is made determines how consistently it performs from the first box to the thousandth. Here is how the process works in a brake pad factory, step by step. You can see more of this on our brake parts factory page.
Material Mixing and Hot Pressing
- Weighing: each raw material is weighed to a defined tolerance; small errors in resin or abrasive content change friction behavior.
- Mixing: ingredients are blended until fibers and fillers are evenly distributed. Time and order are controlled, because over-mixing damages fibers.
- Backing plate preparation: plates are shot-blasted, then coated with adhesive or given mechanical retention features.
- Preforming (optional): the mix is cold-pressed into a preform for consistent filling.
- Hot pressing: the mix is pressed onto the backing plate in a heated mold, bonding it to the plate and partially curing the resin.
Curing, Grinding, Chamfering and Slotting
- Post-curing: pads are oven-baked on a controlled temperature profile, often for several hours, to complete curing.
- Grinding to the specified thickness and parallelism.
- Slotting and chamfering to the drawing.
- Scorching (optional): surface heating that pre-burnishes the pad and reduces initial fade.
- Finishing: coating, shim fitting, wear indicator assembly, marking and packaging.
From Our Production Floor:
In one 2026 light-truck front brake pad pilot project, we checked 120 pad sets after slot grinding. The drawing called for a 4.5 ± 0.3 mm slot depth, while 7 pads measured outside that range, reaching 4.1–5.0 mm. We reset the grinding fixture stop and rechecked the next 180 sets, with measurements stabilized at 4.3–4.7 mm. Slot depth is easy to overlook because the pad still fits and still brakes. But slot depth changes how the pad vibrates and how it vents, so we treat it as a controlled dimension, not a cosmetic one.
Dimensional and Shear Strength Testing
Every production batch should be checked for:
- Dimensions: length, width, total thickness, friction thickness, flatness and parallelism, compared with the drawing.
- Shear strength: the force needed to separate the friction material from the backing plate. According to ISO 6312, shear testing measures the strength of the bond between the lining material and its carrier for disc brake pad and drum brake shoe assemblies, using a controlled load rate.
- Compressibility: how much the pad compresses under load and temperature. This affects pedal feel and travel. ISO 6310 defines the compressive strain test methods for disc brake pad assemblies and friction-material samples, including thermal swell and growth.
- Hardness and density: quick checks that the mix and pressing process are consistent.
What to write in the PO or spec sheet:
NVH and Quality Inspection
NVH (noise, vibration and harshness) testing runs the pad on a brake dynamometer through a matrix of speeds, pressures and temperatures while recording squeal. The same dynamometer measures μ, fade and recovery.
You will also see brake pad ratings on the edge of many pads. Under SAE J866, the two-letter edge code (for example, “FF”) indicates the cold and hot friction range of a small lab sample. It helps compare compounds, but it does not show how the pad performs on a specific vehicle. That is where regulatory approvals matter.
Industry Standard — UN Regulation No. 90:
UN Regulation No. 90 covers approval requirements for replacement braking parts, including replacement brake lining assemblies. Ferodo’s R90 technical guidance explains that replacement pads subject to R90 must stay within ±15% of the OE braking performance in the prescribed comparison tests, and approval is application- and friction-material-specific. That is why a brake pad cannot be judged only by material name or friction coefficient. The pad has to be evaluated as part of a specific vehicle application.
High energy brake materials, such as those used on heavy SUVs, light trucks and performance cars, need particular attention to fade and recovery testing. A pad can pass a cold test and still lose a large share of its friction at 400–500 °C.
Final inspection combines visual checks (cracks, bonding, coating, shim, markings) with sampling against the drawing, and every batch should be traceable by code. Our quality control process follows each batch from incoming material inspection to final packaging.
11
How to Choose the Correct Brake Pads
Customers often ask what is the best type of brake pads, or what kind of brake pads are best for their vehicle. The honest answer is the pad that matches the vehicle, the driving conditions and the customer’s priorities. Here is how to tell what brake pads I need, in the form we use when matching a buyer’s list.
Vehicle Application
Step 1: Identify the vehicle precisely: year, make, model, engine and body type. For vehicles with multiple brake options, get the VIN.
Step 2: Identify the axle (front or rear) and confirm whether the vehicle uses disc brakes on that axle.
Step 3: Note any special equipment, such as a towing package, heavy-duty suspension or a sport trim, that may change the brake size.
OE / FMSI / WVA Numbers
Step 4: Record the OE number, FMSI number or WVA number from the old pad, the catalog or the customer’s existing supplier.
Step 5: Cross-reference to the new part number, then confirm shape, indicator and shim details. Where possible, match two independent references (for example, OE and FMSI) rather than relying on one.
Pad Shape and Dimensions
Step 6: If any doubt remains, measure the old pad: length, width, total thickness and backing plate profile. Check tab positions, the indicator location and any piston clip.
Step 7: For new SKUs in a store range, compare a physical sample against the old part or the OE drawing before placing a volume order.
Friction Material and Driving Application
Step 8: Choose the friction material based on use:
So what is the best brake pad material? There is no single winner. For most passenger cars, a good ceramic compound offers the best balance of noise, dust, rotor life and pedal feel. For heavier or harder-working vehicles, semi-metallic or heavy-duty formulations are often the better type of brake pad. What are good brake pads, then? Pads that fit correctly, use a compound suited to the job, are made with consistent dimensions and bonding, and come with traceable batch records.
When a customer asks “what kind of brake pads do I need,” these steps take two minutes at the counter and prevent a return.
12
Brake Pads for Auto Parts Stores and Repair Shops
Auto brake pads move through two different businesses: a store needs the right car brake pad on the shelf, and a shop needs the job done once.
What Auto Parts Stores Should Check
Step by step, building or reviewing a pad range
- Export your last 12 months of sales and lost-sales requests by part number.
- Group them by FMSI shape to see which geometries drive volume.
- Identify fast movers (stock deep), mid movers (stock moderately) and slow movers (supply on request).
- Confirm cross references for every stocked SKU.
- Review return reasons quarterly and fix the root cause, whether catalog, label or product.
We support this kind of range planning on our brake parts solutions for auto parts stores page, including private label packaging and mixed-SKU orders.
What Repair Shops Should Check
For a shop, the cost of a brake pad for a car is small compared with the cost of a second visit. The routine that prevents comebacks is simple: verify fitment, measure the rotor, service the caliper slides, replace the hardware, bed the pads, and road-test the car. Our brake parts solutions for repair shops page covers how we support noise, vibration and uneven-wear diagnosis with technical review.
Whether the business is a store or a shop, the same principle applies to every automotive brake pad: match the application first, then choose the compound.
13
Frequently Asked Questions About Brake Pads
How long do brake pads last?
Most passenger-car brake pads last roughly 30,000–70,000 miles (50,000–110,000 km). Driving style, vehicle weight, city use, terrain and friction material all change that figure. Front pads usually wear faster, and vehicles with regenerative braking often see much longer pad life.
How thick are new brake pads?
New passenger-car pads typically have about 10–12 mm of friction material, plus a steel backing plate of around 5–6 mm. Most shops recommend replacement at about 3 mm of friction material, and treat 2 mm as the absolute limit. Always check the vehicle manufacturer’s specification.
Ceramic or semi-metallic—which is different?
Ceramic pads are generally quieter, cleaner and gentler on rotors. Semi-metallic pads offer stronger bite and better heat tolerance for heavy vehicles and towing, at the cost of more noise and dust. The right choice depends on the vehicle and how it is driven.
Why do brake pads squeak?
Most squeal comes from vibration between the pad, rotor and caliper. Common causes are missing or worn shims, a worn or glazed rotor, incomplete bedding, dry abutment clips, or a pad without the correct chamfers and slots. A steady squeal while driving can also mean the wear indicator is touching the rotor.
Can I replace brake pads without replacing rotors?
Yes, if the rotors are above minimum thickness, within runout and thickness-variation limits, and free of deep scoring or heat damage. If not, resurface or replace them. Fitting new pads on a worn rotor is a common cause of noise and vibration complaints.
Are brake pads and brake shoes the same?
No. Brake pads are used in disc brakes and clamp a rotor. Brake shoes are curved and press outward against the inside of a drum. Both use friction material, and “brake shoe pad” is sometimes used loosely to describe a shoe’s lining. Many vehicles use pads at the front and shoes at the rear.
What is the difference between brake lining and brake pad?
In brake lining vs brake pad discussions, “lining” usually means the friction material itself, especially on brake shoes, while a “pad” is the complete disc-brake assembly. In trade language, brake pads and linings are both friction parts, and the brake lining and brake pad are often ordered together for vehicles with front discs and rear drums.
How do I know which brake pads fit my vehicle?
Start with the OE number or FMSI number from the old pad or a catalog, then confirm with the vehicle’s year, make, model and, where needed, the VIN. If the catalog shows more than one option, measure the old pad or send photos with dimensions to your supplier before ordering.
14
Final Thoughts
A brake pad looks like a simple part, but its performance depends on five things working together:
Get the material right but the geometry wrong, and the pad squeals. Skip the rotor check, and the car comes back with vibration. Ship the wrong reference, and the part never leaves the box. Identify carefully, specify clearly and install properly, and write purchase orders that describe the application, material, critical dimensions and test evidence, not just “ceramic brake pads.”
If you are building or reviewing a brake pad range, send us your OE numbers, FMSI or WVA numbers, current aftermarket references, VINs or your existing purchasing list. We will match the pads, flag any references that need confirmation, and prepare a quotation for your full list.